![[AR] A step-by-step guide on building a website from brand naming, domain registration, logo design to deployment — using maretoto.com as a real example](/hugo/images/2026-05-14-how-to-build-a-site.png)
Want to build a website but don’t know where to start? This article uses maretoto.com as a real-world example, walking you through every step: from brand naming, domain checking, logo design to final website deployment.
Step 1: Choose Your Brand Name
Everything starts with a name. A great brand name should be concise, memorable, and distinctive.
Using the Name Generator Tool
Visit Name Generator and enter your business keywords or inspiration words. The tool will generate plenty of brand name candidates:
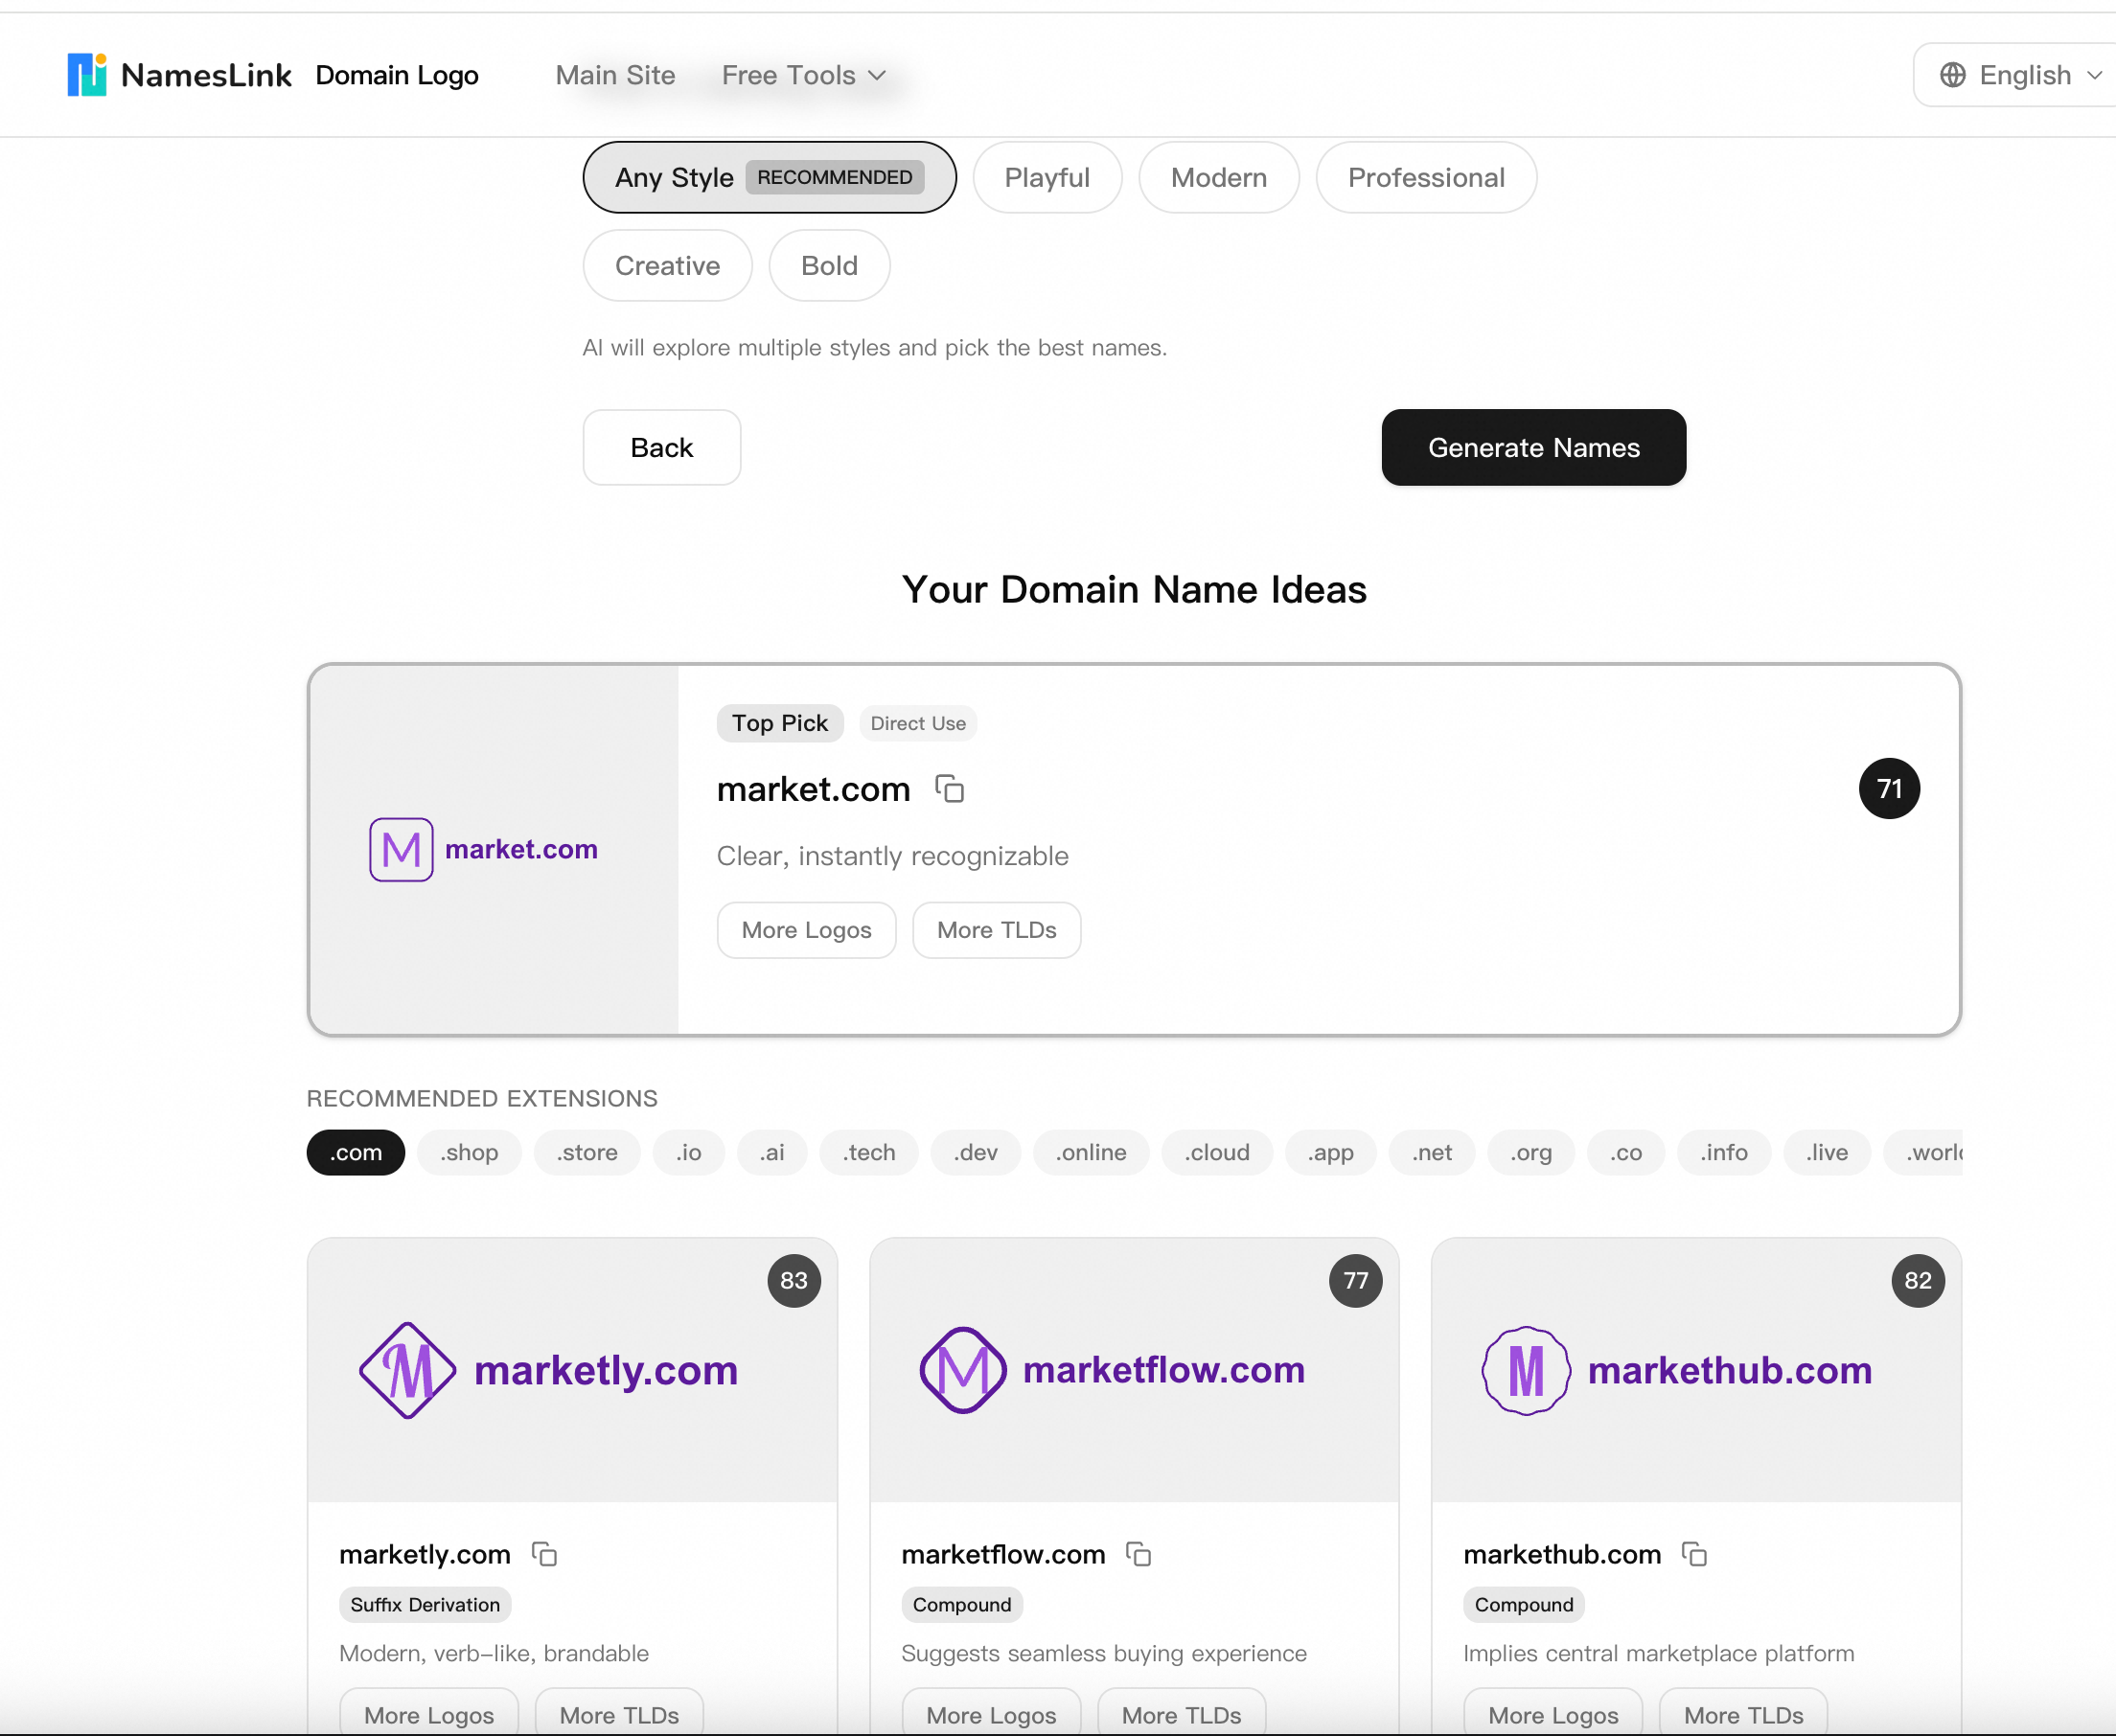
- Enter your industry or product direction (e.g., “gaming”, “tech”, “marketplace”)
- Choose your style preference (Any Style, Playful, Modern, Professional, etc.)
- The tool automatically generates Top Pick recommendations and multiple suffix variations
- Browse the generated name list and shortlist the ones you like most
In our example, Maretoto is a catchy, unique name with strong brand potential.
Naming Tips: Good brand names are typically 6-10 characters, easy to spell and pronounce, and don’t easily get confused with existing brands.
Step 2: Check Domain Availability
Once you’ve settled on a few candidate names, check if the corresponding domain is available for registration.
Using the Domain Search Tool
Visit Domain Search and enter your chosen name:
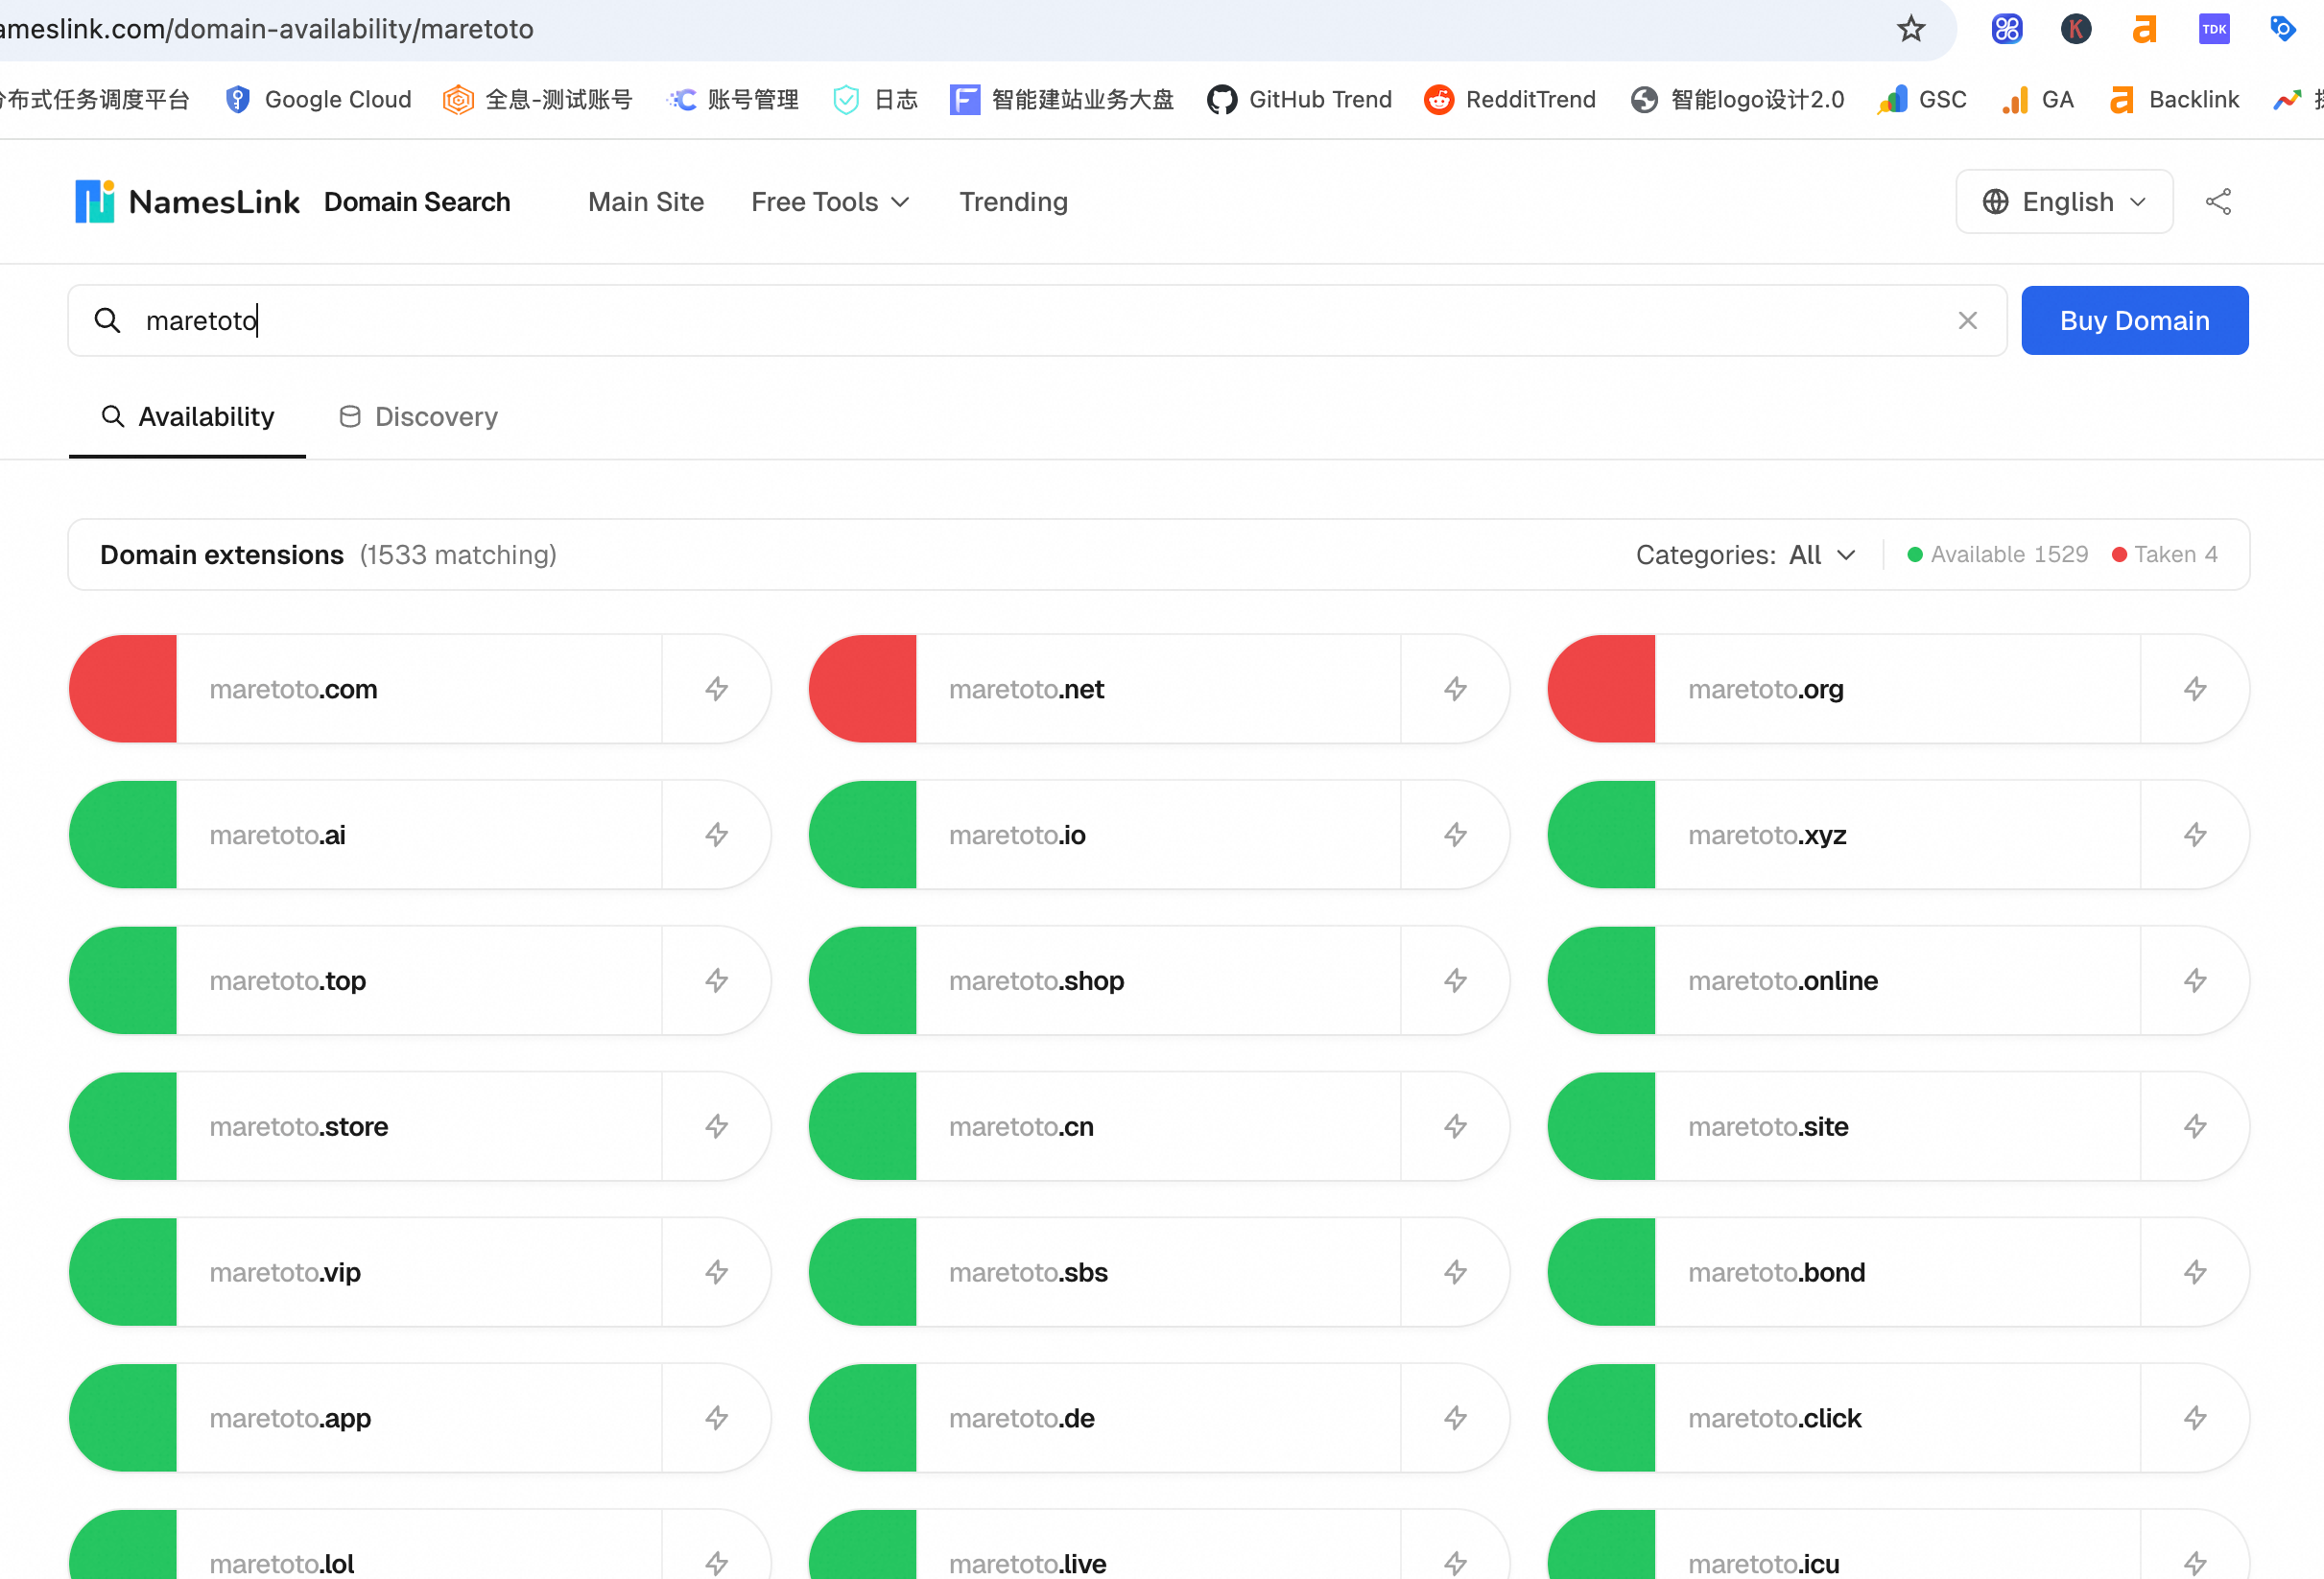
- Type
maretotoin the search box - The tool displays availability across thousands of TLDs (.com, .ai, .net, .org, .io, etc.)
- Green indicates available for registration, red means already taken
- Review pricing and registration information
.com is the most universal choice — it has the highest global recognition and user trust. If you’re targeting an international audience, .com is almost a must.
What If .com Is Already Taken?
Don’t worry! The domain search tool shows the status of all TLDs simultaneously. If .com is already registered by someone else, consider these alternatives:
- Alternative TLDs:
.io(popular for tech companies),.ai(ideal for AI projects),.co(short and modern),.net, etc. - Buy the registered domain: If
.comis critical for your brand, you can contact the current owner to negotiate a purchase - Tweak the brand name: Add a prefix or suffix (e.g.,
getmaretoto.com,maretoto.app)
Domain Selection Tips:
- Prefer
.comextension- If
.comis unavailable, prioritize.io,.ai, or.co- Avoid hyphens and numbers (unless they’re part of the brand itself)
- Make sure the spelling won’t be easily misunderstood
Step 3: Design Your Brand Logo
With your name and domain sorted, it’s time to create a logo for your brand.
Using the Logo Generator
Visit Logo Generator:
![]()
- Enter your brand name
Maretoto - Optionally add an icon description (e.g., “gpt”, “tech”, “wave”) to guide the AI design
- Click “Generate More Logos” to get different styles
- Choose your favorite design from the options
- Download the logo file package
Logo Usage Tips
When choosing a logo, prefer vector-style (SVG) designs — these logos auto-scale to any size without distortion or blurring. Whether it’s displayed in the website header, as a mobile app icon, or on a large poster, it stays crisp and sharp.
The downloaded logo file package typically includes all the image assets you need for website building:
- Favicon (small icon for browser tabs)
- Multiple PNG sizes (for website, social media avatars, etc.)
- SVG vector file (infinitely scalable without quality loss)
- Transparent background version (easy to use on any background color)
This means you don’t need to hire a separate designer for image processing — just download and use them directly in your website project.
A good logo should be:
- Simple: Clearly recognizable even at small sizes
- Scalable: Use vector format so it looks perfect at any size
- Versatile: Works on websites, social media, business cards, etc.
- Distinctive: Clearly different from competitors
- Color-harmonious: Usually 2-3 colors work best
Step 4: Purchase Your Domain
After confirming availability, it’s time to officially purchase your domain.
Domain Purchase Process
- Choose a reliable domain registrar (e.g., Nameslink, Namecheap, GoDaddy)
- Search and add the domain to your cart
- Select registration period (at least 2 years recommended)
- Enable WHOIS privacy protection (protects your personal info)
- Complete payment
Pro Tip: If the domain you want is already owned by someone else (for example, maretoto.com is currently for sale on Nameslink), you can contact the owner to negotiate a purchase.
Post-Purchase Setup
After purchase, you’ll need to:
- Confirm domain ownership verification email
- Set up DNS records (point domain to your server)
- Configure SSL certificate (enable HTTPS)
Step 5: Build and Deploy Your Website
With the domain ready, the final step is building and deploying your website.
Choose Your Website Building Method
Depending on your technical level and needs:
| Method | Best For | Pros | Cons |
|---|---|---|---|
| WordPress | Non-technical users | Rich plugins, quick start | Requires server maintenance |
| Hugo/Next.js | Developers | Fast, highly customizable | Requires coding knowledge |
| Wix/Squarespace | Complete beginners | Drag-and-drop, no code | Limited flexibility |
| Vercel/Netlify | Frontend developers | Free hosting, auto-deploy | Best for static sites |
Deployment Steps
Using a static site + Vercel as an example:
- Create project: Initialize with Hugo, Next.js, or your framework of choice
- Develop site: Add pages, styles, and interactions
- Push code: Push to a GitHub repository
- Connect Vercel: Import your GitHub project on Vercel
- Configure domain: Add custom domain
maretoto.comin Vercel settings - DNS setup: Point DNS records to Vercel at your domain registrar
# Typical DNS configuration
A     @     76.76.21.21
CNAME www   cname.vercel-dns.com
Once deployed, visiting maretoto.com will show your website!
Summary
The complete website building workflow:
- Name it → Name Generator to brainstorm brand names
- Check domain → Domain Search to verify availability
- Design logo → Logo Generator to create brand identity
- Buy domain → Choose a registrar and complete purchase
- Build & deploy → Pick your tools and go live
The entire process can be completed within a single day. The most important thing is taking the first step — start naming your project now!